I recently bought this router for the Camper Van to have a good connectivity while on the road. I want to use OpenVPN to remote control the Teltonika device while operating on a mobile network. Usually a fixed IP is needed on the SIM card which is inconvenient to get.
I configured the OpenVPN connection using the exported configuration but it never established a connection. I also noticed that I won’t ask for username/password but this is required to connect to Synology’s OpenVPN server.
The support documents at the Teltonika website didn’t really fit to my situation with Synology.
This instructions are written for the RUTX11 but should be usable on other Teltonika models as well.
1.Identifying the issue
To read the logfile on the Teltonika router I opened System -> Administration -> Troubleshoot -> Show (System Log)
One line caught my eye:
daemon.err openvpn(Test)[3644]: neither stdin nor stderr are a tty device and you have neither a controlling tty nor systemd – can’t ask for ‘Enter Auth Username:’. If you used –daemon, you need to use –askpass to make passphrase-protected keys work, and you can not use –auth-nocache.
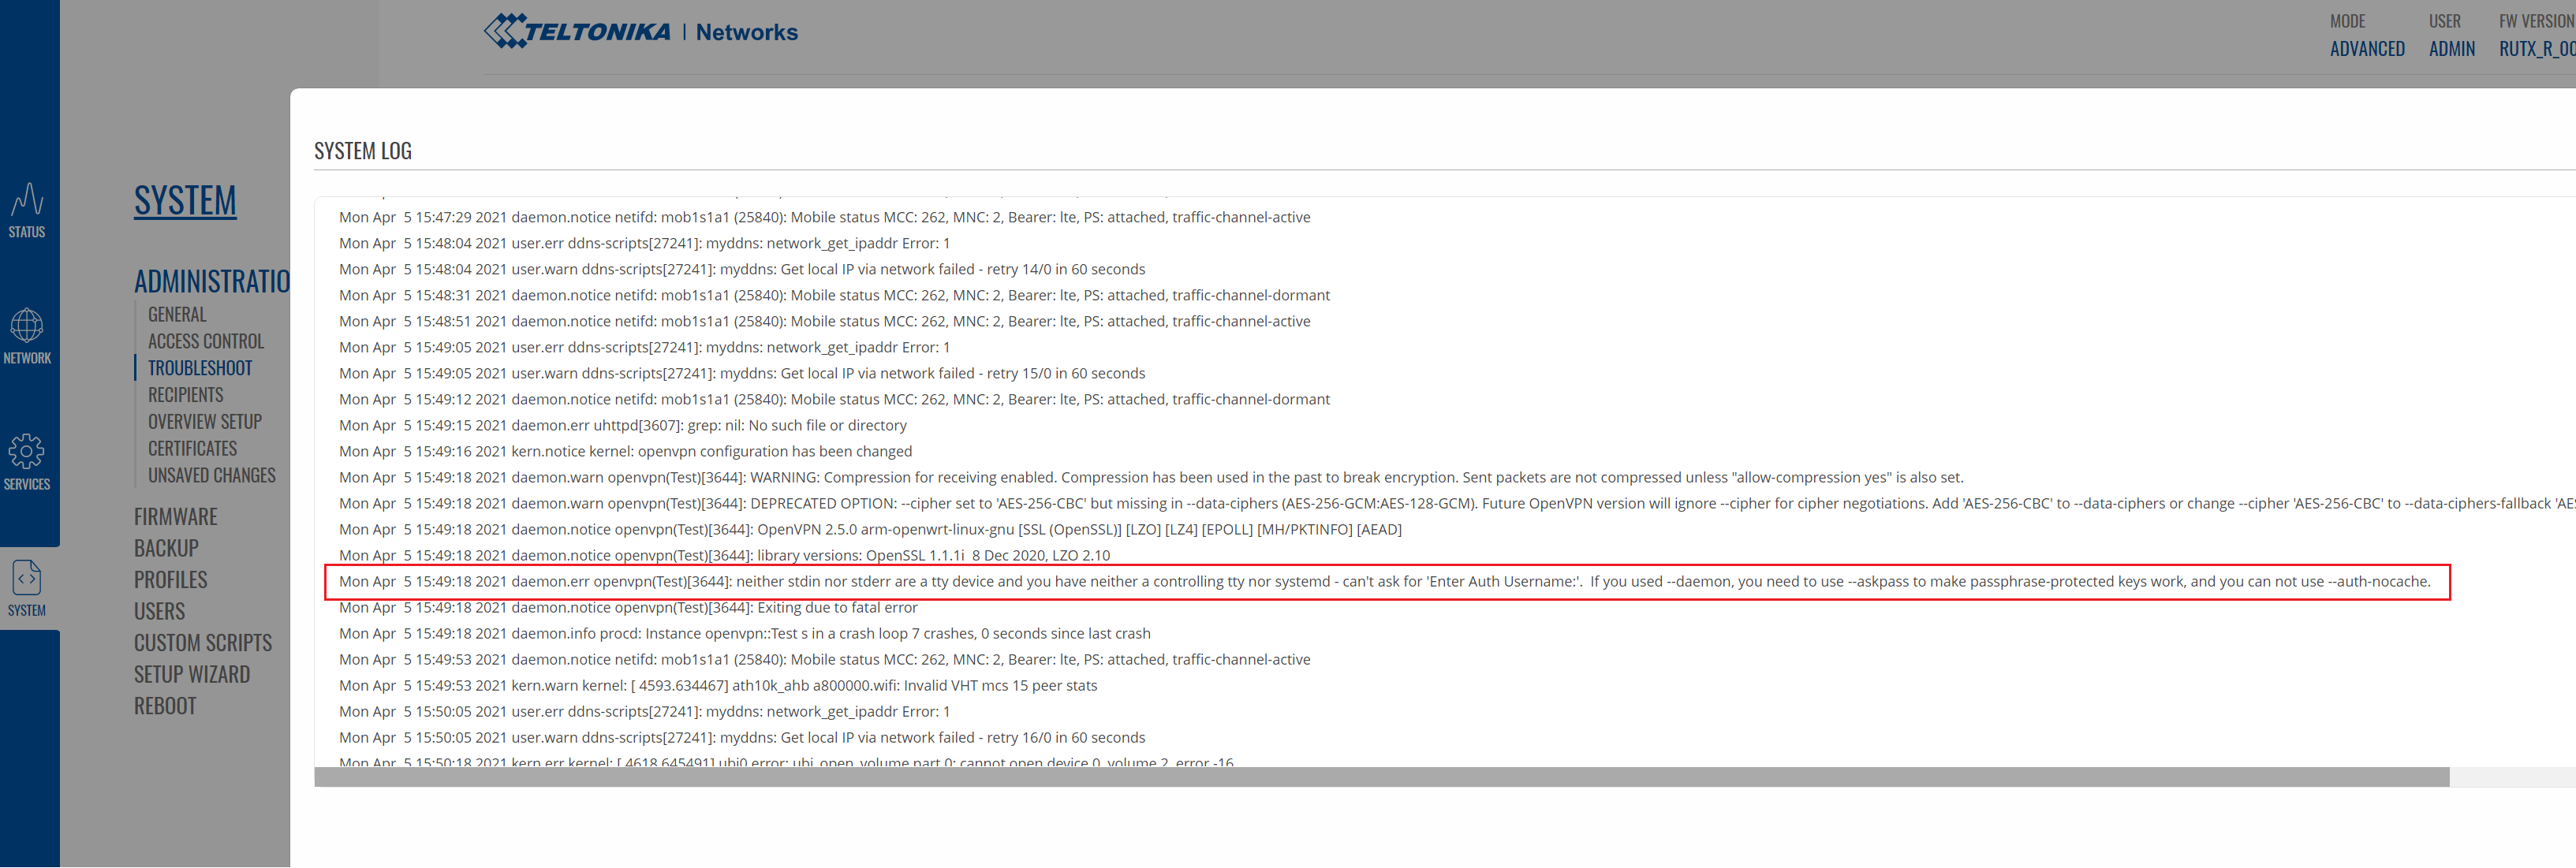
So the issue is that Username/Password is required for Synology OpenVPN but the Teltonika expects a certificate based authentication.
2. Solution
Its quite simple to fix.
- Connect with WinSCP to the Teltonika Router. I had to change the Transfer protocol to SCP to make the connection working. Then open /etc/openvpn/ and create a new file “userpass”. Place the username required to connect to the Synology OpnVPN server at the first line and the password on the second line. Save the file.
- Open the VPNConfig.ovpn file from the Synology OpenVPN configuration export and change:
- “auth-user-pass” to “auth-user-pass /etc/openvpn/userpass”
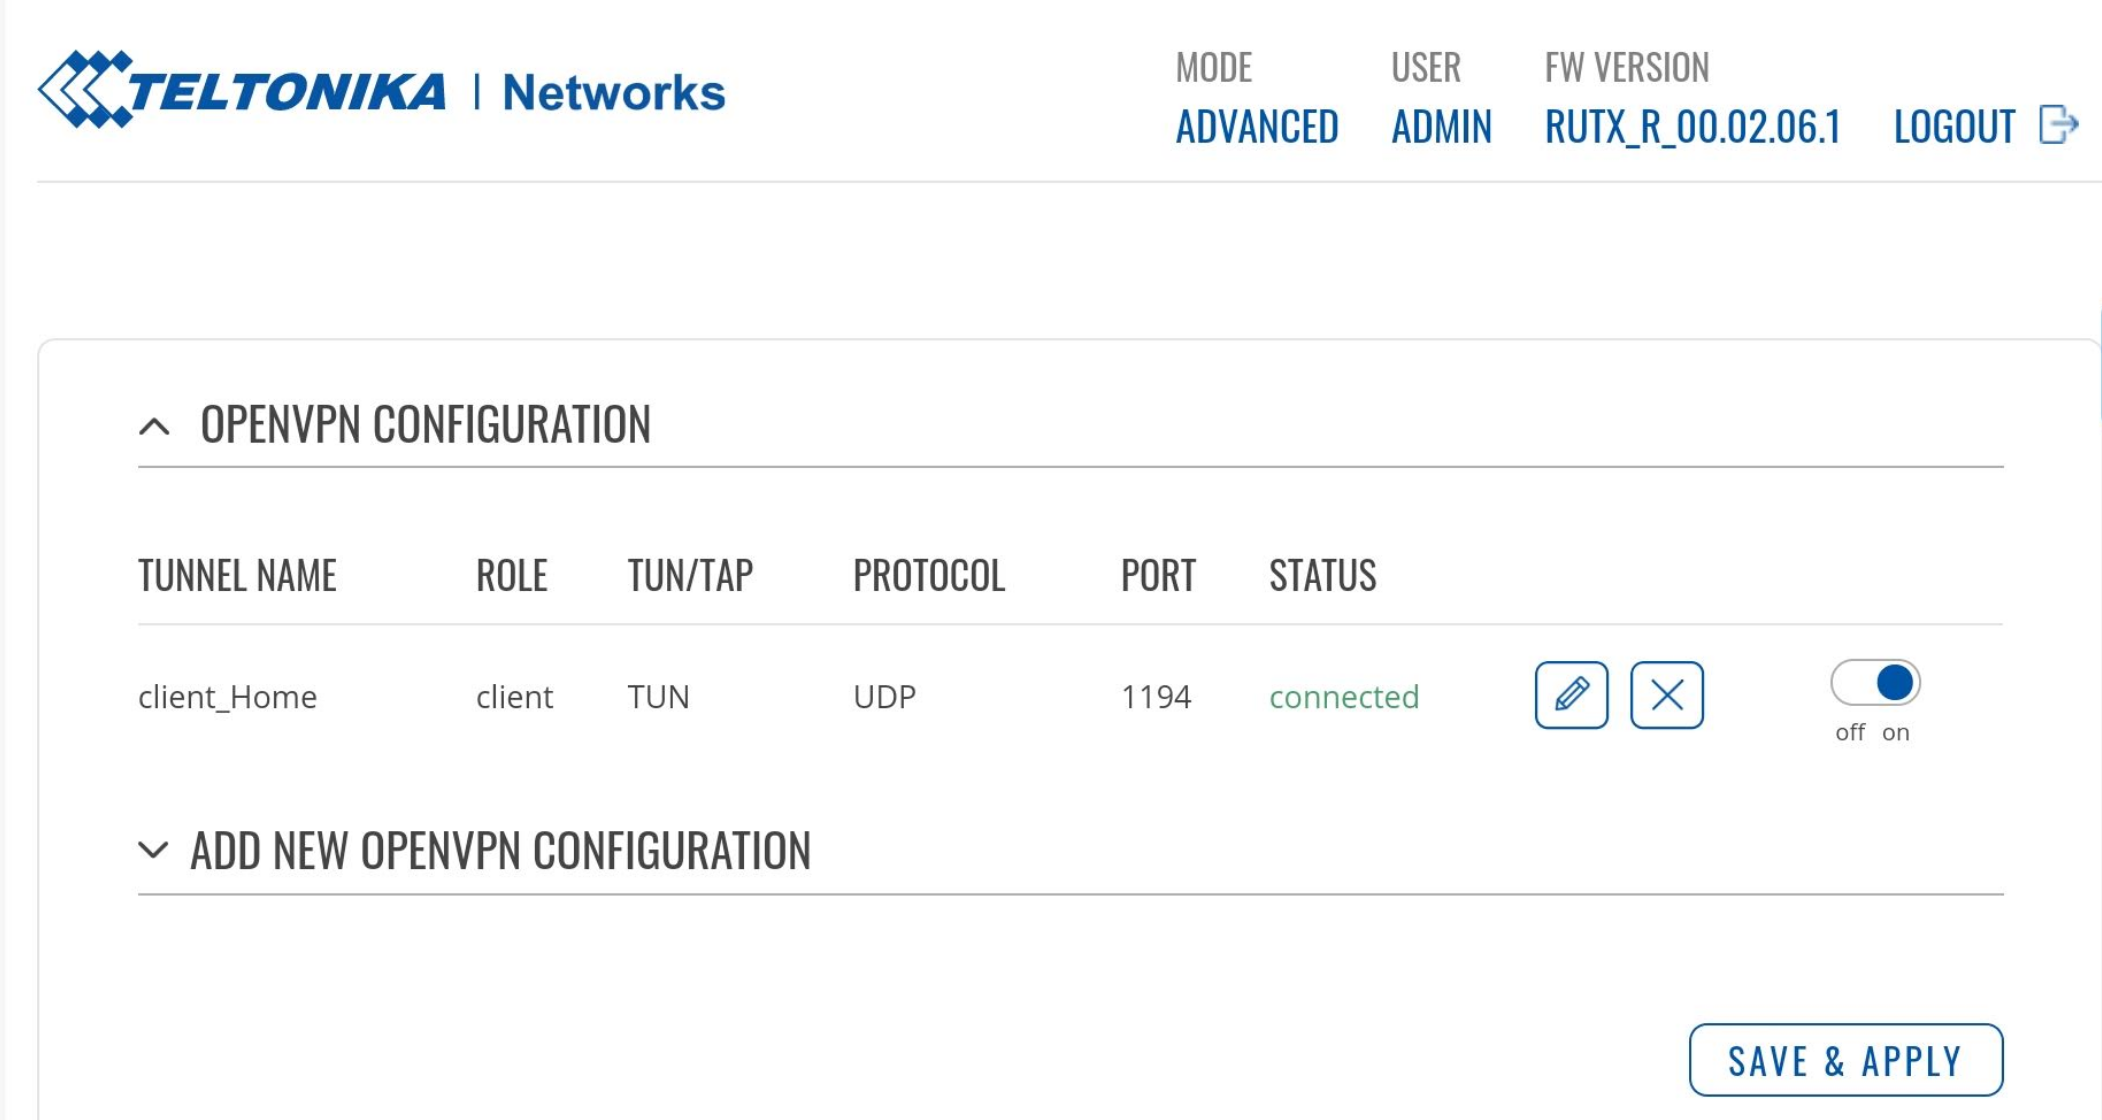
- Now import the VPNConfig.ovpn at your Teltonika Router on Services-> VPN-> OpenVPN-> Add
- Specify Role to be “Client”
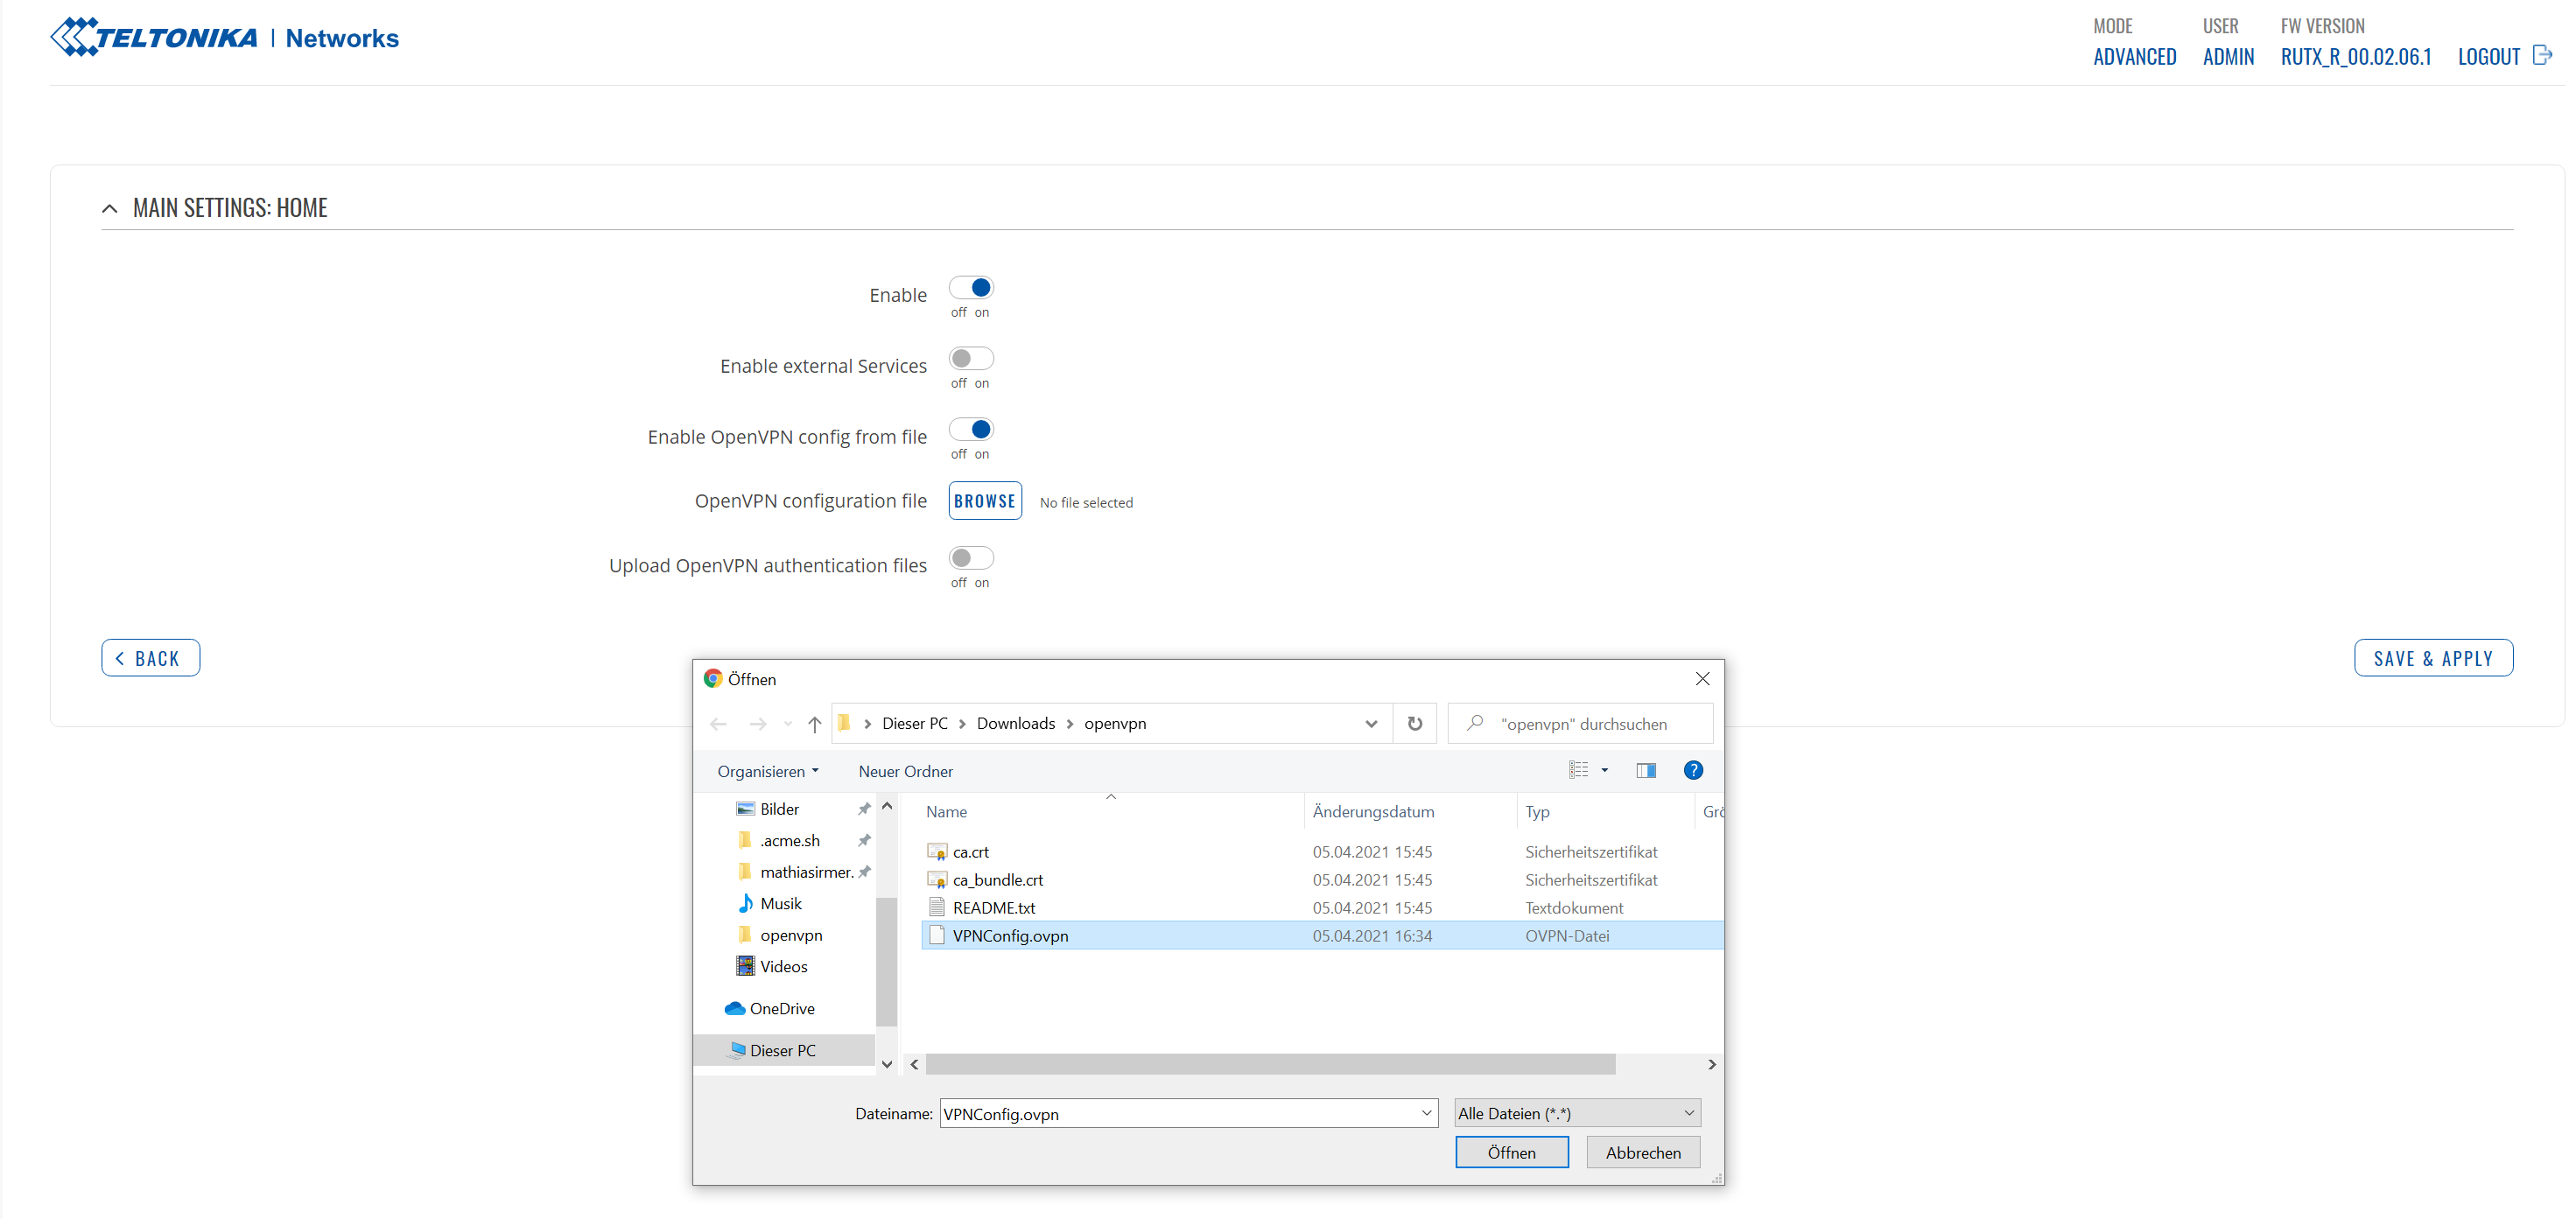
- On the Main Settings page
- Enable -> On
- External Services -> Off
- OpenVPN configuration file -> Select the previously modified VPNConfig.ovpn file
- Upload OpenVPN authentication files -> Off

Voila. Enjoy your OpenVPN connection!
If you like this guide or have questions, please leave a comment. There is a follow up article “How to reach Teltonikas RUTX11 Webinterface thru the OpenVPN Tunnel“.
Remark (Not needed for the above issue but may be helpful for some users): My Synology is reachable from Internet using a certain DNS name. Therefore I need to include the DNS name at VPNConfig.ovpn on the line starting with “remote…”
remote YOUR_Synology_DNS_Name 1194