I recently bought this router for the Camper Van to have a good connectivity while on the road. I want to use OpenVPN to remote control the Teltonika device while operating on a mobile network. Usually a fixed IP is needed on the SIM card which is inconvenient to get.
I configured the OpenVPN connection using the exported configuration but it never established a connection. I also noticed that I won’t ask for username/password but this is required to connect to Synology’s OpenVPN server.
The support documents at the Teltonika website didn’t really fit to my situation with Synology.
This instructions are written for the RUTX11 but should be usable on other Teltonika models as well.
1.Identifying the issue
To read the logfile on the Teltonika router I opened System -> Administration -> Troubleshoot -> Show (System Log)
One line caught my eye:
daemon.err openvpn(Test)[3644]: neither stdin nor stderr are a tty device and you have neither a controlling tty nor systemd – can’t ask for ‘Enter Auth Username:’. If you used –daemon, you need to use –askpass to make passphrase-protected keys work, and you can not use –auth-nocache.
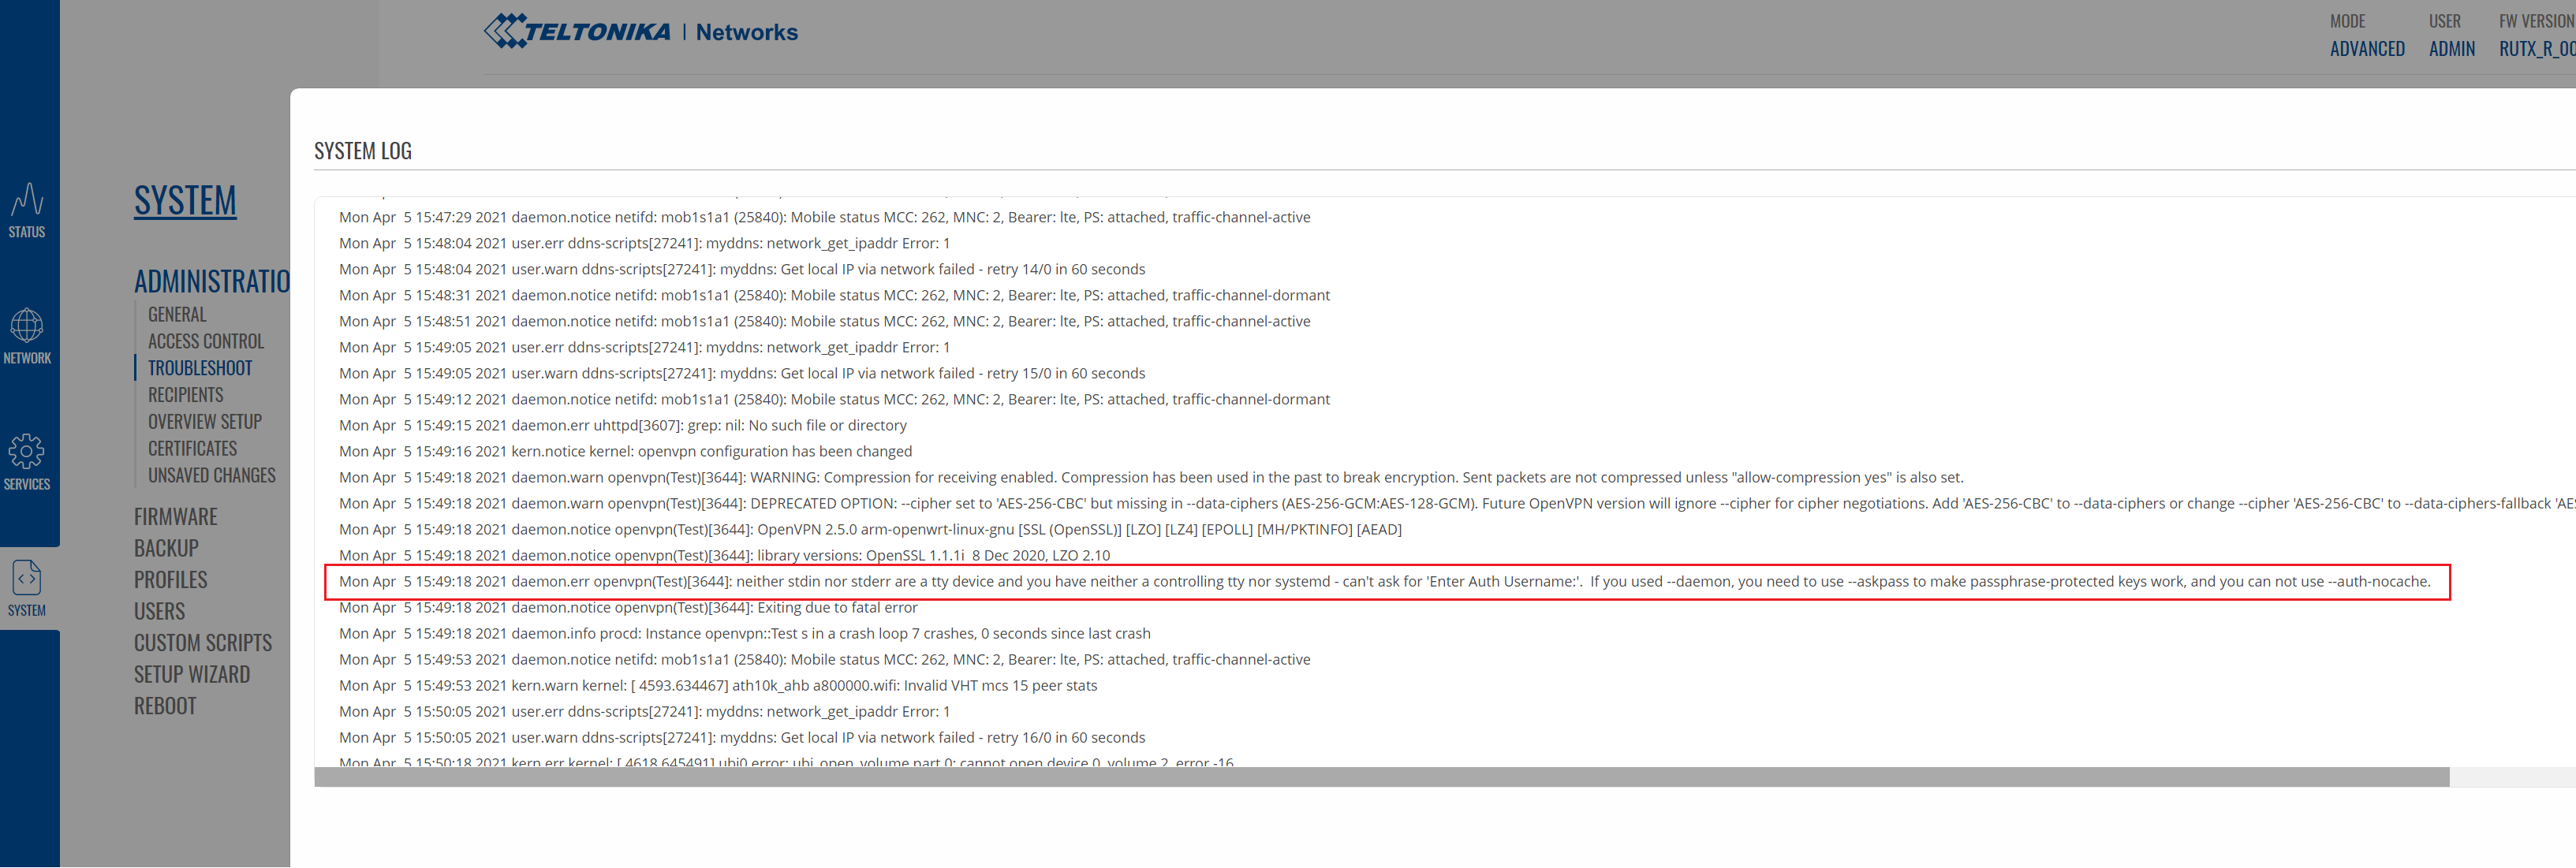
So the issue is that Username/Password is required for Synology OpenVPN but the Teltonika expects a certificate based authentication.
2. Solution
Its quite simple to fix.
- Connect with WinSCP to the Teltonika Router. I had to change the Transfer protocol to SCP to make the connection working. Then open /etc/openvpn/ and create a new file “userpass”. Place the username required to connect to the Synology OpnVPN server at the first line and the password on the second line. Save the file.
- Open the VPNConfig.ovpn file from the Synology OpenVPN configuration export and change:
- “auth-user-pass” to “auth-user-pass /etc/openvpn/userpass”
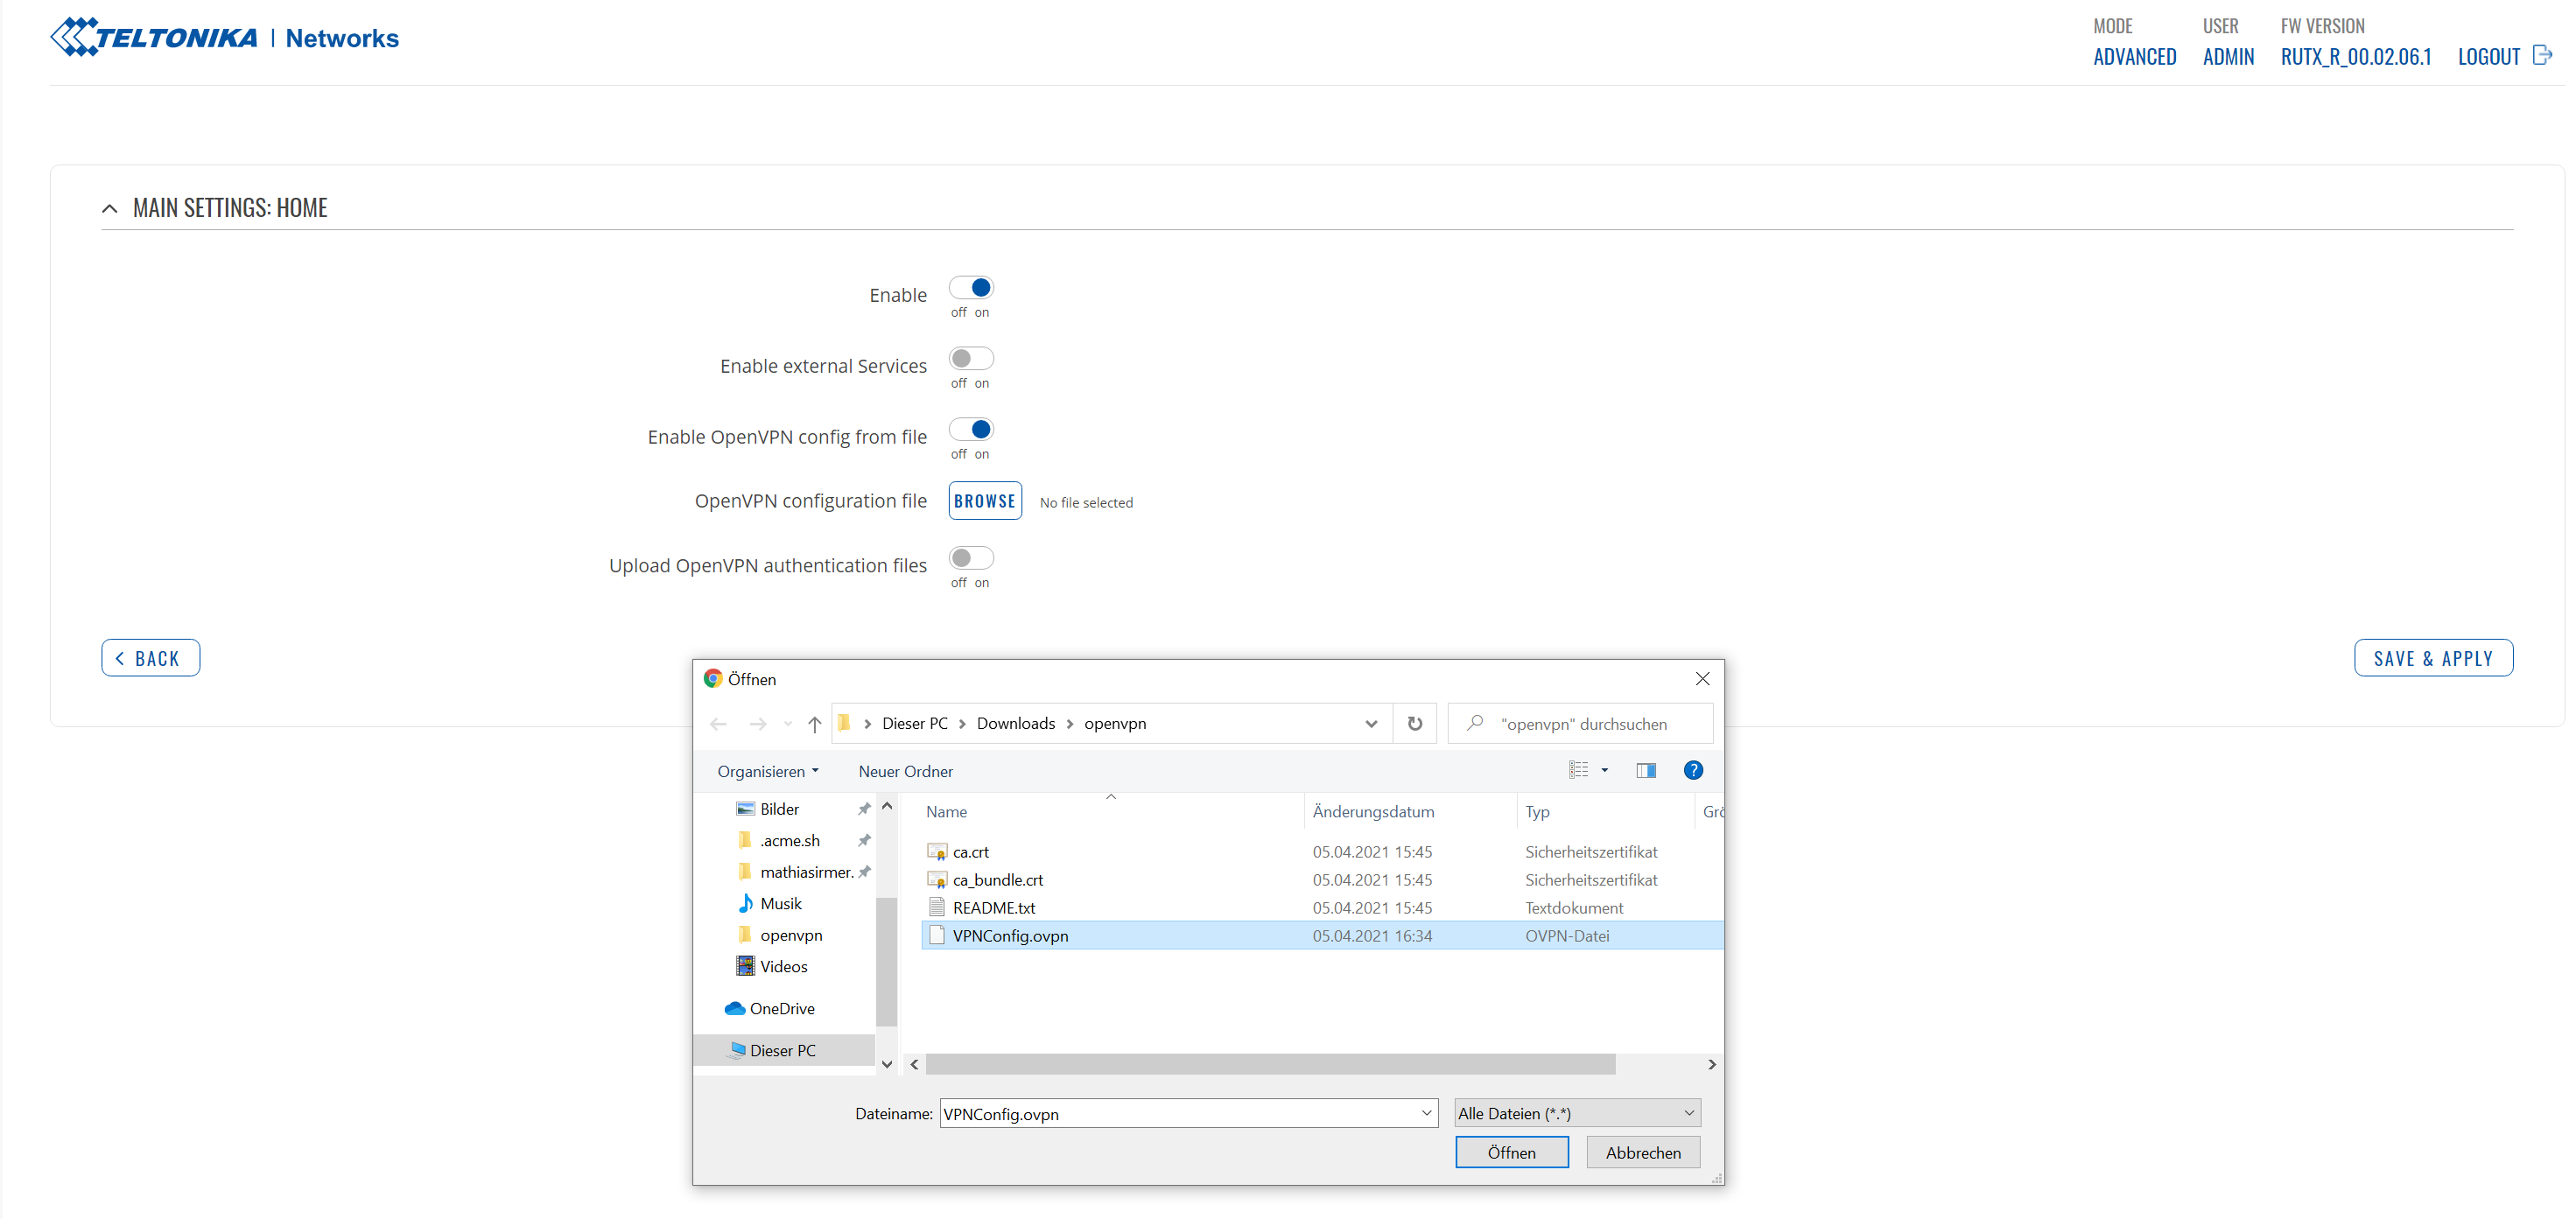
- Now import the VPNConfig.ovpn at your Teltonika Router on Services-> VPN-> OpenVPN-> Add
- Specify Role to be “Client”
- On the Main Settings page
- Enable -> On
- External Services -> Off
- OpenVPN configuration file -> Select the previously modified VPNConfig.ovpn file
- Upload OpenVPN authentication files -> Off

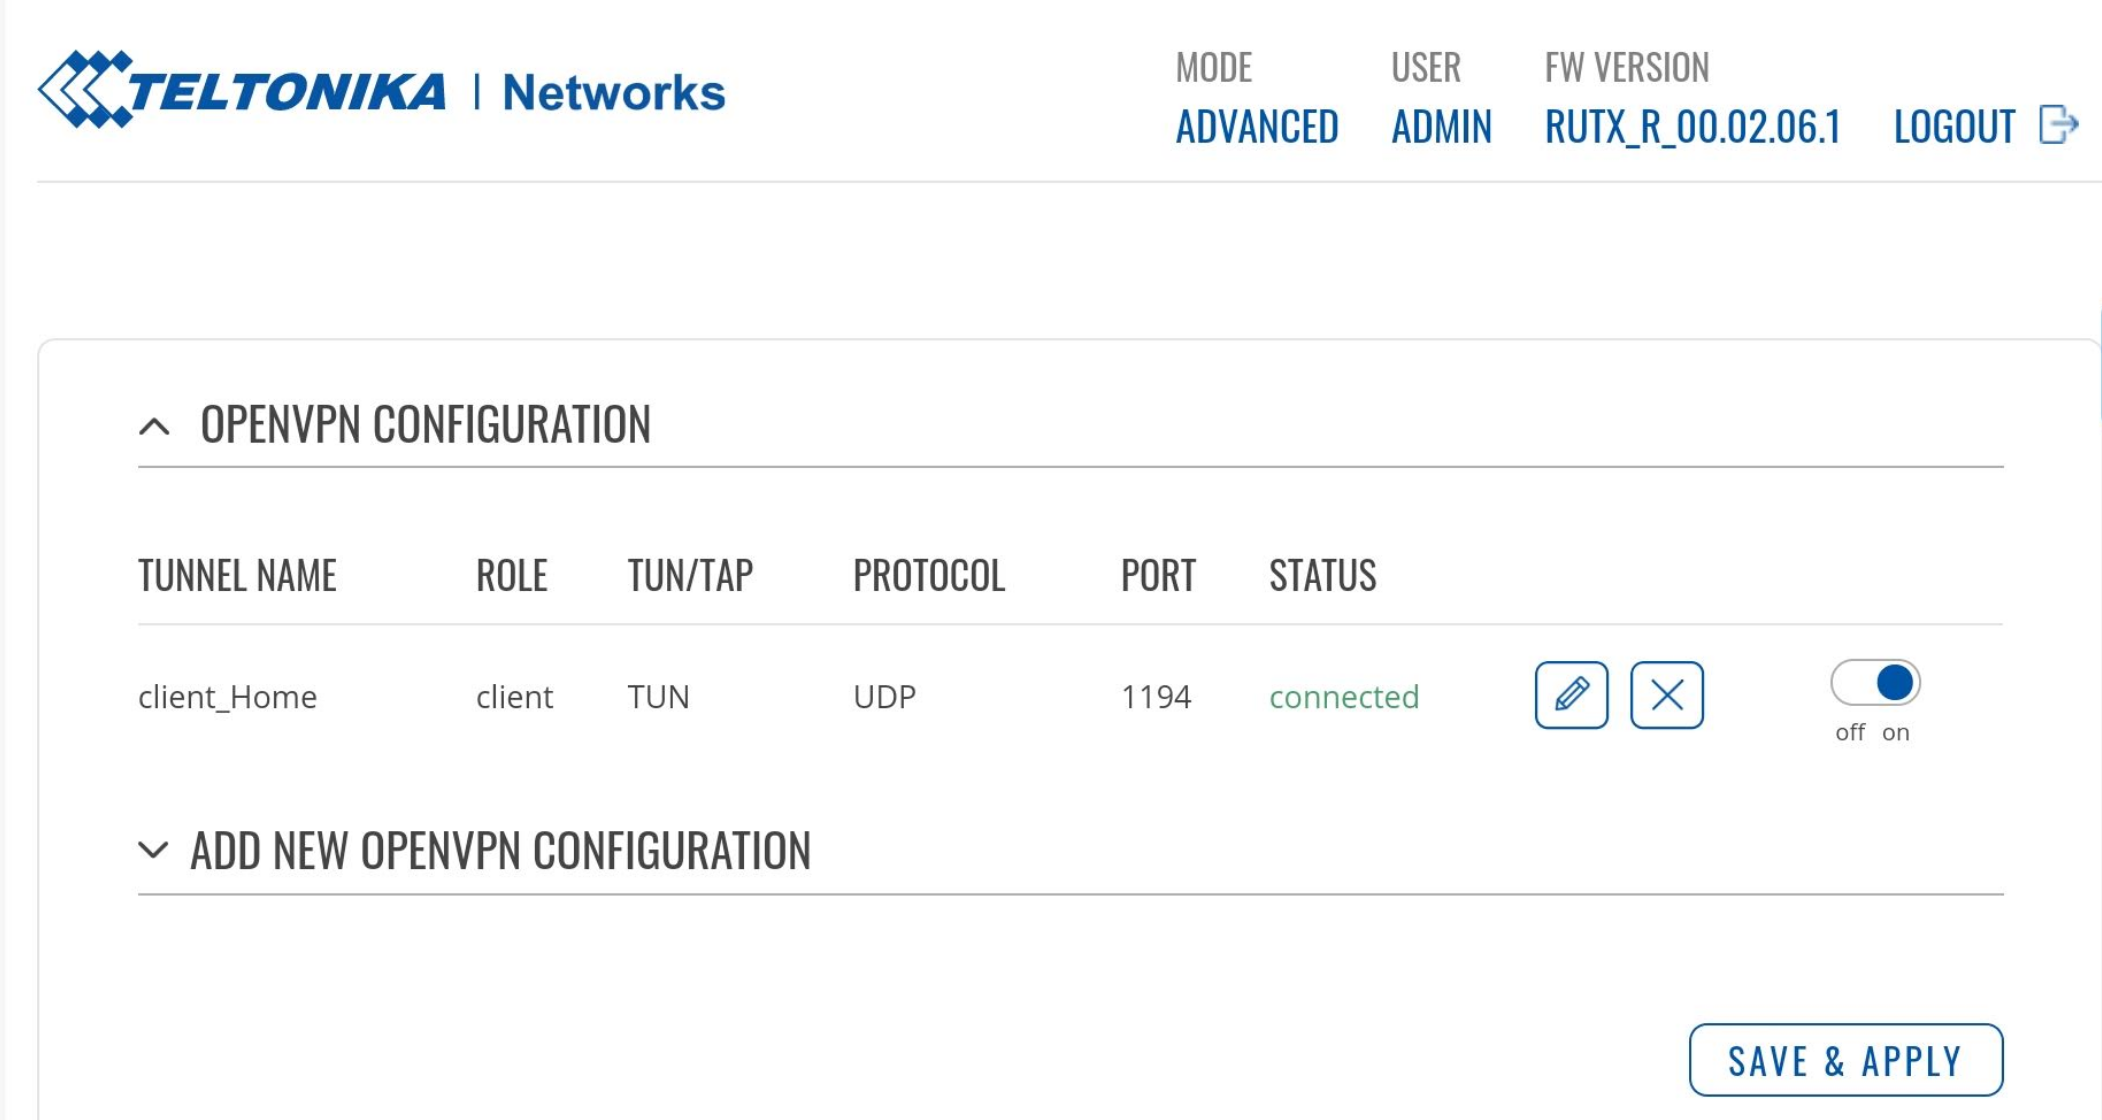
Voila. Enjoy your OpenVPN connection!
If you like this guide or have questions, please leave a comment. There is a follow up article “How to reach Teltonikas RUTX11 Webinterface thru the OpenVPN Tunnel“.
Remark (Not needed for the above issue but may be helpful for some users): My Synology is reachable from Internet using a certain DNS name. Therefore I need to include the DNS name at VPNConfig.ovpn on the line starting with “remote…”
remote YOUR_Synology_DNS_Name 1194
Hallo,
diese Anleitung ist auch noch 2024 gültig mit DSM 7.x mit OpenVPN Server und RUT240 R_00.07.06.6
Vielen Dank, hast mir sehr viel Sucherei erspart 😉
für den RUT240 schaffe ich nicht mal die SCP Verbindung mit WINSCP. Hat hier noch jemand eine Idee.
bzw. eine Erklärvideo / Beschreibung?
Der RUT240 ist halt sehr günstig und hat viele SMS Komandos.
Mit dem aktuellen Firmware RUT2_R_00.07.02.4 scheint es nun möglich zu sein den RUT240 mit einer Synology NAS verbinden zu können.
hab ich mir gedacht … und auch schon versucht. Irgendwie geht das nicht in der GUI mit einem Statische Routen Eintrag. Falls ich was rausfinde, werde ich es hier schreiben. Vorerst vielen Dank …
woww – dachte das ist die Lösung und änderte die Zeile “auth-user-pass” to “auth-user-pass /etc/openvpn/userpass” nach dem Erstellen von userpass. Aber zumindest in meinem RUT955 mit der Firmware v. 00.06.07.5 wird das einfach ignoriert. Aber dann fand ich raus, dass in der openvpn client config eine Einstellung TLS/Password vorhanden ist (dropdown liste). Diese schaltet die Eingabe von user/pass frei. Allerdings muss man dann noch das “Zertifikat der Zertifizierungsstelle” (QNAP.ca) hochladen, das man vom Server bekommt. Dann läuft die VPN-Verbindung in meinem Fall mit QNAP QVPN-Service 2. Das war der erste Schritt. Dann die fixe Route in der Fritzbox eintragen und schon lief auch der Zugriff auf den Teltonika Router. Aber wie kommt man ins LAN (192.168.x.x) das hinter dem Teltonika Router liegt? Da sind wohl noch weitere Versuche nötig – aber immerhin bin ich jetzt schon ein Riesen Schritt weiter. Dass es auf der LTE-Seite keine öffentliche IP gibt, scheint nicht zu stören. Vielen Dank.
achja, was nich noch vergass zu erwähnen, ich verwende nicht das *.ovpn-file sondern konfiguriere alles von Hand. Wichtig wohl auch keepalive zu aktivieren, gerade bei LTE ohne öffentliche IP.
Hey, funktioniert das ganze auch mit ner Fritz Box als Router? Habe da das gleiche Problem das kein Nutzername und Passwort hinzugefügt werden kann…
Soweit ich weiß macht die Fritz Box IPsec und kein OpenVPN. Das ist etwas anders, schau die dazu relevante Anleitungen an.
oh man, ich hab gestern den ganzen Tag an dem Scheiss gesessen….
Danke, hast mich gerettet!
Das freut mich, Nils. Ich hab auch ne Weile gebraucht um das herauszufinden, finde es schade das es bei Teltonika nicht beschrieben ist aber die wollen wohl ihre eigene Fernsteuerung verkaufen.
Bin gerade am probieren ob ich meine Autoterm air 2d Standheizung über den IO Eingang steuern kann, schiebe dann eventuell noch mal ein Update nach.
da haben wir denselben Hintergedanken. Deshalb möchte ich auch eine 2-Weg VPN-Verbindung zum Womo. Aber es sieht so aus als ob Teltonika für alle Möglichkeiten ziemlich Steine in den Weg gelegt hat. MQTT wäre auch eine Möglichkeit, aber selbst das ist aussergewöhnlich harzig zu bewerkstelligen. Der Gedanke mit der Teltonika-eigenen Fernsteuerung ist wohl gar nicht so daneben.
Hallo Beat
In der Anleitung steht ja drin wie du das mit dem VPN leicht hinbekommst. Läuft prima bei mir. Sogar ein Vorrang WLAN vor 4G ist ganz leicht machbar.
Viele Grüße aus Dresden
Mathias
ich nehme an Du meinst Deine Anleitung. Mit dem Fritzbox Routing komme ich nur bis zum openvpn-client des Teltonika mit der Adresse 10.8.1.6 in meinem Fall. Alles was dahinter liegt (mit der Adresse 192.168.9.x ist nicht erreichbar. Irgendein Route-Eintrag fehlt da wohl noch.
Wenn du noch Geräte dahinter laufen hast, musst du im Teltonika Router noch eine Route dafür einrichten. Ich plane das erst im Winter wenn ich mal Zeit habe den Victron Monitor auf nem Raspi zu bauen.